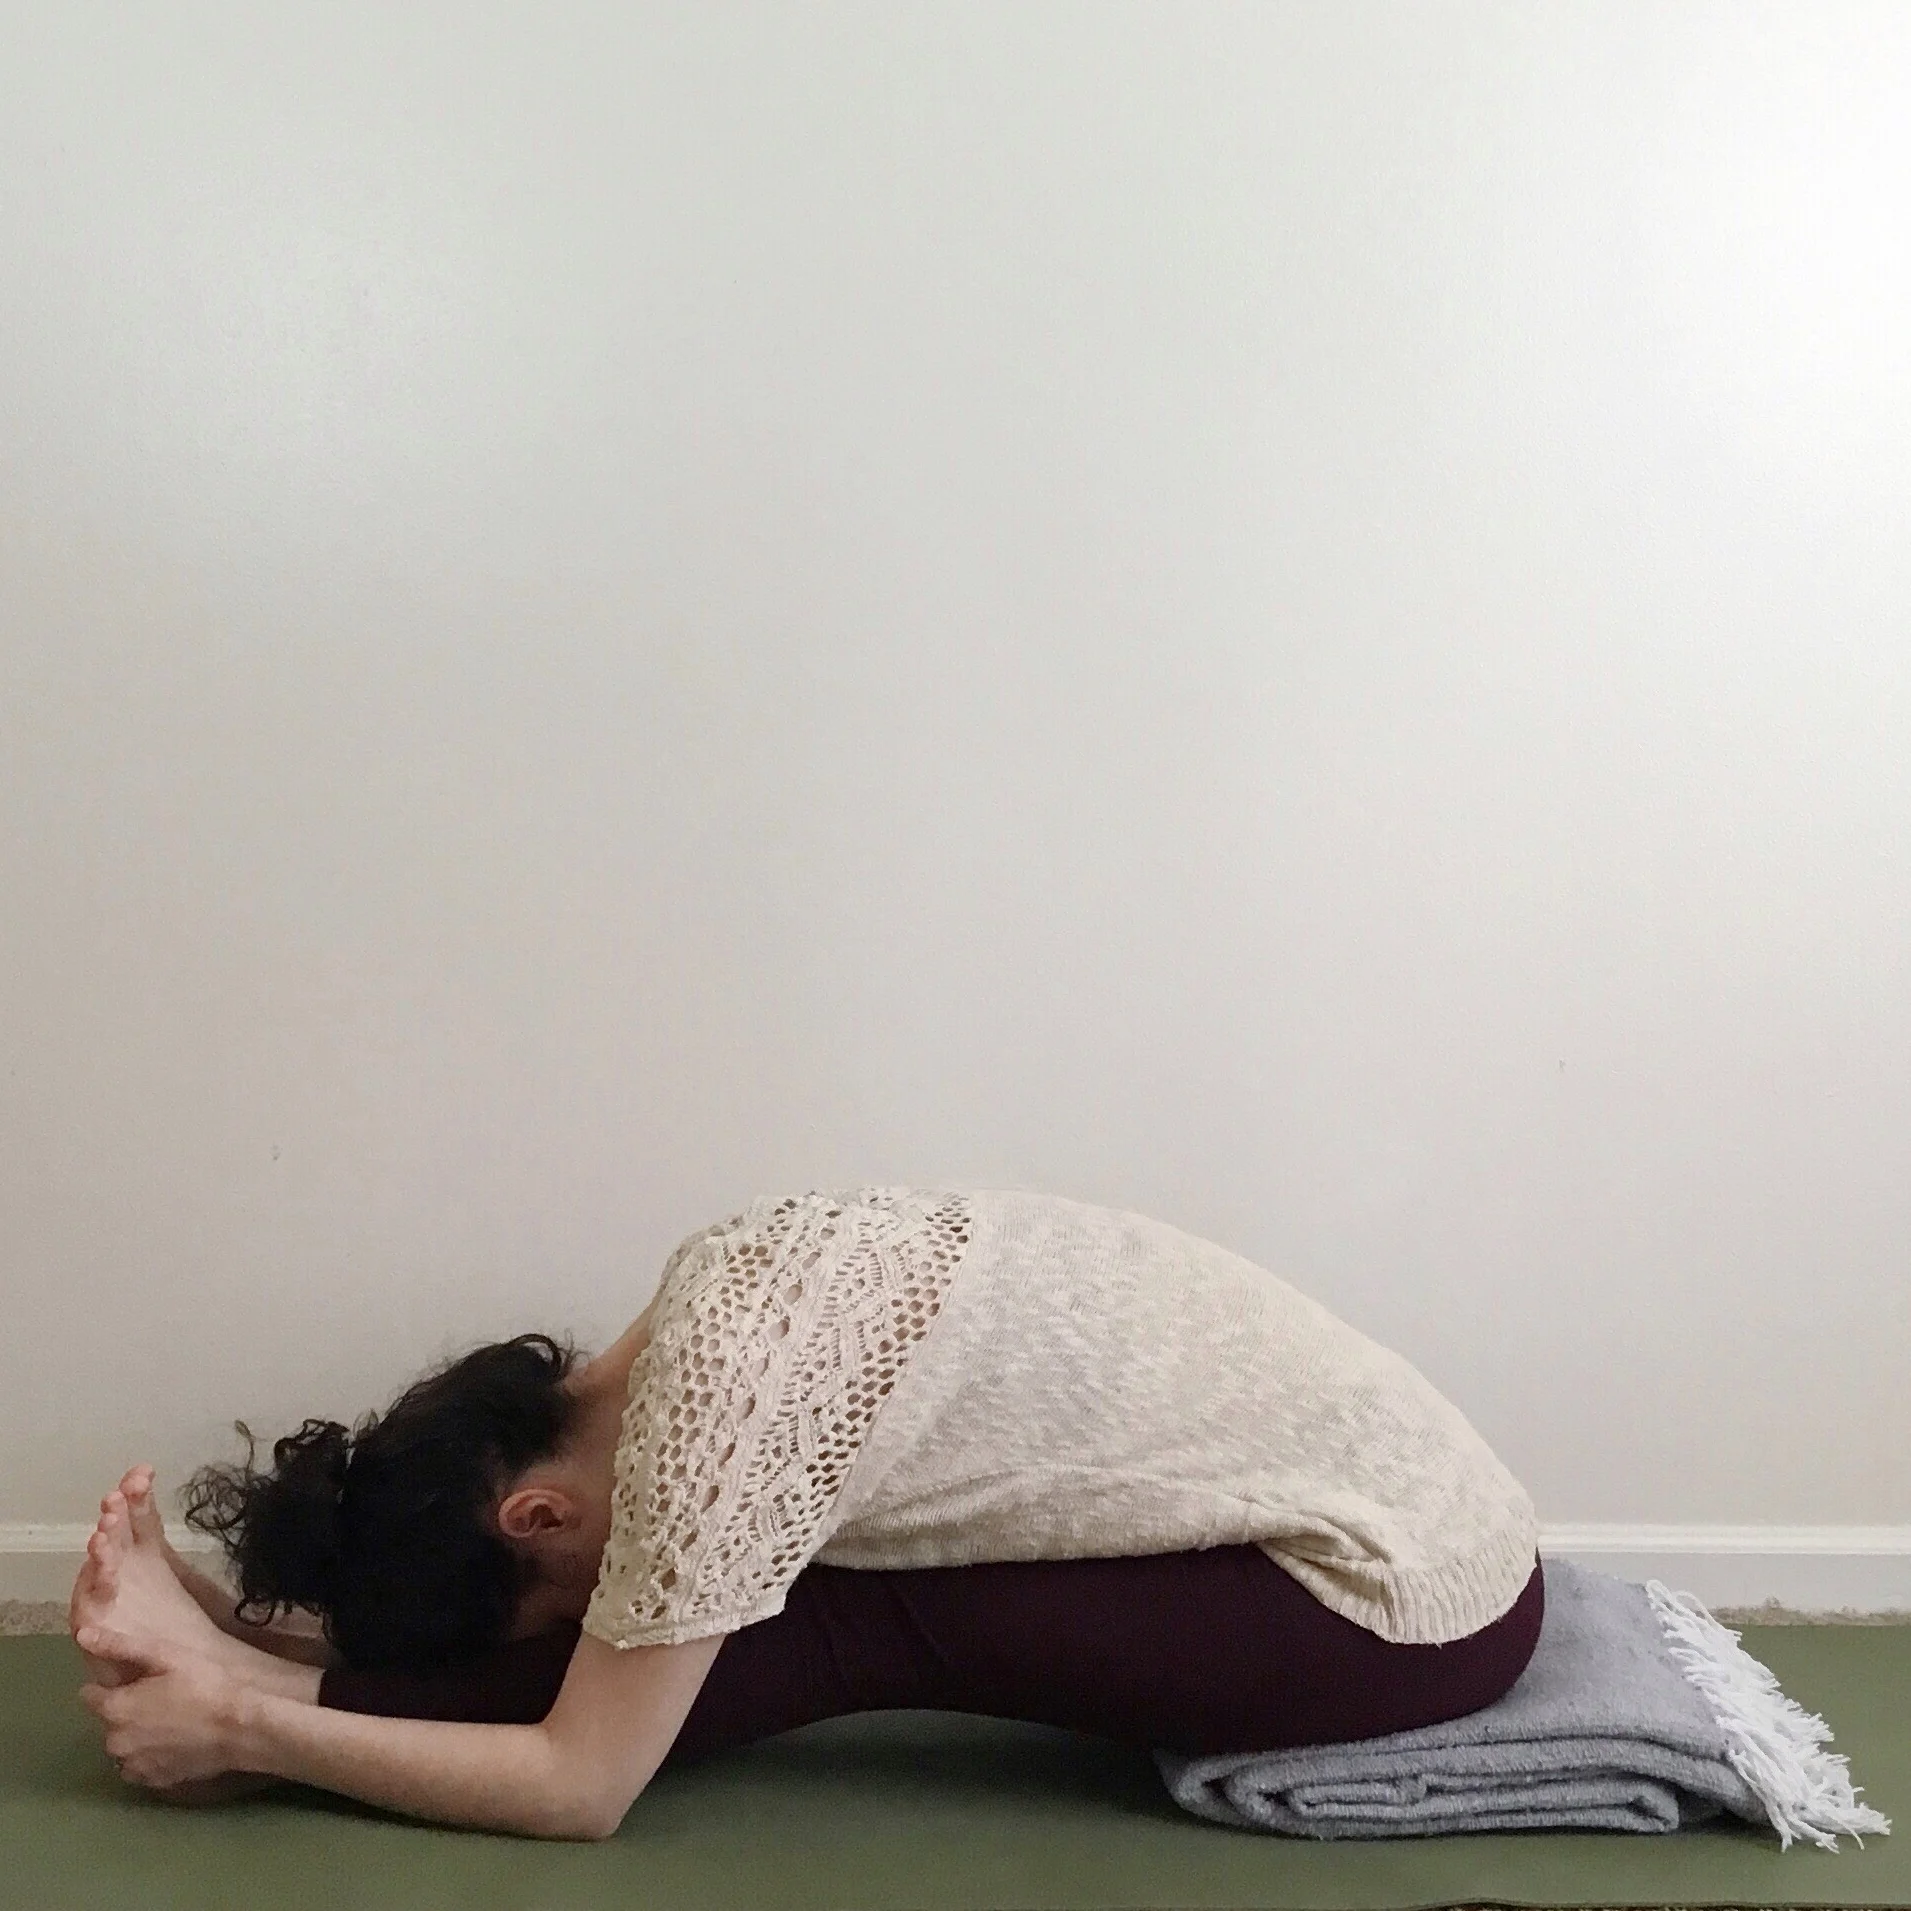
PASCHIMOTTANASANA: SEATED FORWARD BEND
Contrary to popular belief, Paschimottanasana (seated forward bend) is not about touching your toes or being able to tap your knees with your nose. It's actually about creating length, as much length as you possibly can, in your spine and in your hamstrings.
Paschimottanasana comes with so many benefits, including:
massaging the internal organs and improving digestion
relieving lower back pain
soothing the nervous system
stretching the hamstrings and spine
There are so many different ways to modify this pose, so you're sure to find a variation that feels good for your body.
TRADITIONAL PASCHIMOTTANASANA
With legs stretched out in front of you and feet flexed, first sit up nice and tall, reaching through the entire spine. Draw the lower belly in as you tilt the pelvis forward to create length in the back legs. Slowly walk your hands forward, keeping your back flat as you fold over your legs and reach for the feet with your hands. Do not compromise the straightness of your spine in order to come closer to your legs. Doing so may strain the lower back, which can be very sensitive. As long as you continue to practice, the flexibility will come.
Practice this pose for ten breaths or longer if part of a yin or restorative practice.
Alignment tips:
Engage the lower belly and lengthen your tailbone to protect your lower back.
Keep the spine tall and the shoulders relaxed.
Be mindful of your neck - it is an extension of your spine
Avoid this pose if you have herniated spinal discs or other back injury, or diarrhea.
SEATED VARIATIONS
1. Adding a folded blanket or a yoga block under your hips will help to facilitate the pelvic tilt that is required to fold forward in this pose. This creates extra length in the hamstrings, and you might find that even a prop at a low height makes a big difference.
2. If you have tight hamstrings, try adding a rolled up towel, blanket or a yoga bolster under your knees. This allows you to relax into the pose while keeping the knees bent.
3. Lassoing a yoga strap around your feet can help you to work on deepening your flexibility while still honoring your body. Remember to keep your spine tall and the shoulders relaxed. If you start to feel like you're clenching your jaw or restricting your breath, you've gone too far into the pose and should back up to the point where you feel sensation but are still comfortable enough to breathe.
RESTORATIVE VARIATIONS
When practicing this pose as a part of a bedtime or restorative practice, it's important that we are able to rest the head to fully immerse ourselves in the pose and soothe the nervous system. Using props is the best way to achieve this goal. Remember that you can always combine modification ideas to achieve the ideal support for your body.
CHAIR YOGA VARIATION
To practice this variation, sit at the edge of a chair with the legs extended in front of you. The feet should be flexed, toes pointed toward the ceiling. You can rest your hands on your thighs or on two blocks. Sit up tall, lengthen the crown of your head away from your tail bone. Tilt your pelvis forward and pull the low belly in to protect your lower back and create additional length in your hamstrings. Keep your neck neutral. Shoulders away from your ears. Hold for ten deep breaths.
SUPINE VARIATION
For this variation, you will need a yoga strap. To come into this pose, lie flat on your back with your strap at the ready. Bend your knees into your chest and lasso both feet with your strap. Begin to extend your legs and reach the heels toward the sky. Make sure that your strap is long enough so that when you extend your legs, you can still keep your shoulder blades and elbows glued to the mat. This will prevent you from straining your neck. If there is a bend in your knees here, that's okay!
Take ten deep breaths here and then release the hold.


